One login for everything: putting authentik in front of a self-hosted app
 +
+- 1Lock down Docker networks
- 2Run containers as non-root
- 3Identity in front of every port
- 4Membership, not just an account
- 5An identity for the agent, not a key
- 6A tool server that checks who is asking
- 7Where the agent can go, not just what it can call
- 8Move the daemon off root
- 9Run the model's own code without trusting it
- 🏆A scope per tool, and a refusal clients can act on
Part 1 closed the ports nobody meant to open. Part 2 stopped two containers from running as root. Both were about the machine. Neither touched the question a self-hosted AI stack answers worst: who is allowed to log in, and where is that decided?
Same box as before. The Langfuse we've been hardening since Part 1 — the one whose Postgres, ClickHouse and Redis Part 1 found correctly bound to localhost, and whose worker Part 2 dropped off root — was deployed back in Catch what your tests miss. Two parts have now secured the machine underneath it without once touching the application's own front door. This is the first part that changes Langfuse itself.
Right now that decision is made in each app, separately. Langfuse has its own email-and- password table. So does every other tool on the box. Each one is a place where an account can outlive the person who owned it, where a password can be reused, and where "remove this person's access" means remembering that the app exists at all.
This post moves that decision to one place. That place is authentik — an open-source identity provider you run yourself, the self-hosted counterpart to Okta or Auth0. It holds the accounts, runs the login screen, and vouches for who someone is to any app that asks. Apps stop storing passwords and start asking authentik.
It's the same job Keycloak does, and Keycloak is the better-known name. authentik earns the pick here on setup cost: a compose file and a wizard against Keycloak's realms, clients and JVM tuning. For one box and one app, that difference is the whole decision.
We deploy it, connect Langfuse to it over OIDC, and end with a login that goes through authentik and back.
One WEC Instance: 8 vCPU AMD EPYC 7601, 15 GB RAM, Docker 29.1.3, kernel 5.15.
authentik 2026.8.1 from ghcr.io/goauthentik/server, Postgres 16. Langfuse v3
(langfuse/langfuse:3) — the deployment carried over from Parts 1 and 2, reachable at
10.80.4.212:3001. authentik published on host port 9100.
Addresses in this post are a private LAN. Substitute yours. Everything here is plain HTTP on a trusted network, which is fine for a first run and not fine for anything reachable from outside — see What's next.
The vocabulary, before the clicking
Every OIDC guide assumes you already know these five words. Getting them straight up front is the difference between configuring this once and guessing at fields for an hour.
OP and RP. The OpenID Provider is the thing that knows who people are —
authentik. The Relying Party is the app that wants to be told — Langfuse. The RP
never sees a password. It receives a signed statement from the OP saying "this is
admin@example.com, I checked."
Provider vs application. authentik splits what most tools merge. A provider is the protocol endpoint — the OIDC machinery, the client ID and secret, the redirect URI. An application is the thing users see and the thing access rules attach to. They pair one-to-one: one application, one provider, and the wizard in Step 3 creates both together.
The redirect URI is where authentik is allowed to send the user back after a successful login. It's matched exactly and it's the single most common source of failure. Not a prefix, not a hostname — the full URL, character for character.
Scopes vs grant types. A scope is what information the app asks for
(openid email profile). A grant type is the mechanism by which it asks
(authorization_code). Different questions; the UI puts them near each other and it's
easy to conflate them.
What the login actually does
The part worth noticing: the code travels through the browser, the secret never does. That exchange in the second-to-last step happens between the two containers directly, which is why the client secret is a server-side setting and why Langfuse must be able to reach authentik over the network — not just your browser.
Prerequisites
- A running Langfuse, ideally the one from Part 1
- Docker with the Compose plugin
- A free host port for authentik (we use
9100) - The LAN IP of the box, not
localhost— two containers need to reach each other and your browser needs to reach both
Step 1 — Deploy authentik
authentik ships a compose file and generates its own secrets. Create a directory and pull both down:
mkdir -p ~/authentik && cd ~/authentik
curl -O https://goauthentik.io/docker-compose.yml
Now the environment file. authentik needs a Postgres password and a secret key, both random, plus the ports it will publish:
cd ~/authentik
{
  echo "PG_PASS=$(openssl rand -base64 36 | tr -d '\n')"
  echo "AUTHENTIK_SECRET_KEY=$(openssl rand -base64 60 | tr -d '\n')"
  echo "COMPOSE_PORT_HTTP=9100"
  echo "COMPOSE_PORT_HTTPS=9543"
} > .env
chmod 600 .env
AUTHENTIK_SECRET_KEY signs sessions and tokens. If you lose it, every existing session
and every issued token becomes invalid — so it belongs in your password manager, not
only in this file.
Bring it up. First boot runs database migrations and takes a minute or two:
cd ~/authentik && docker compose up -d
cd ~/authentik && docker compose ps
Three containers — server, worker and postgresql — all reporting (healthy).
Older authentik compose files also shipped a separate redis service; 2026.8.1 no
longer does, so three is correct and nothing is missing. server is the one that has to
be healthy before you continue.

Step 2 — Claim the admin account
authentik's first boot leaves the admin account unclaimed. The setup URL exists exactly once; visiting it is how you take ownership.
Open http://10.80.4.212:9100/if/flow/initial-setup/, and set the email and password
for the default admin (akadmin).
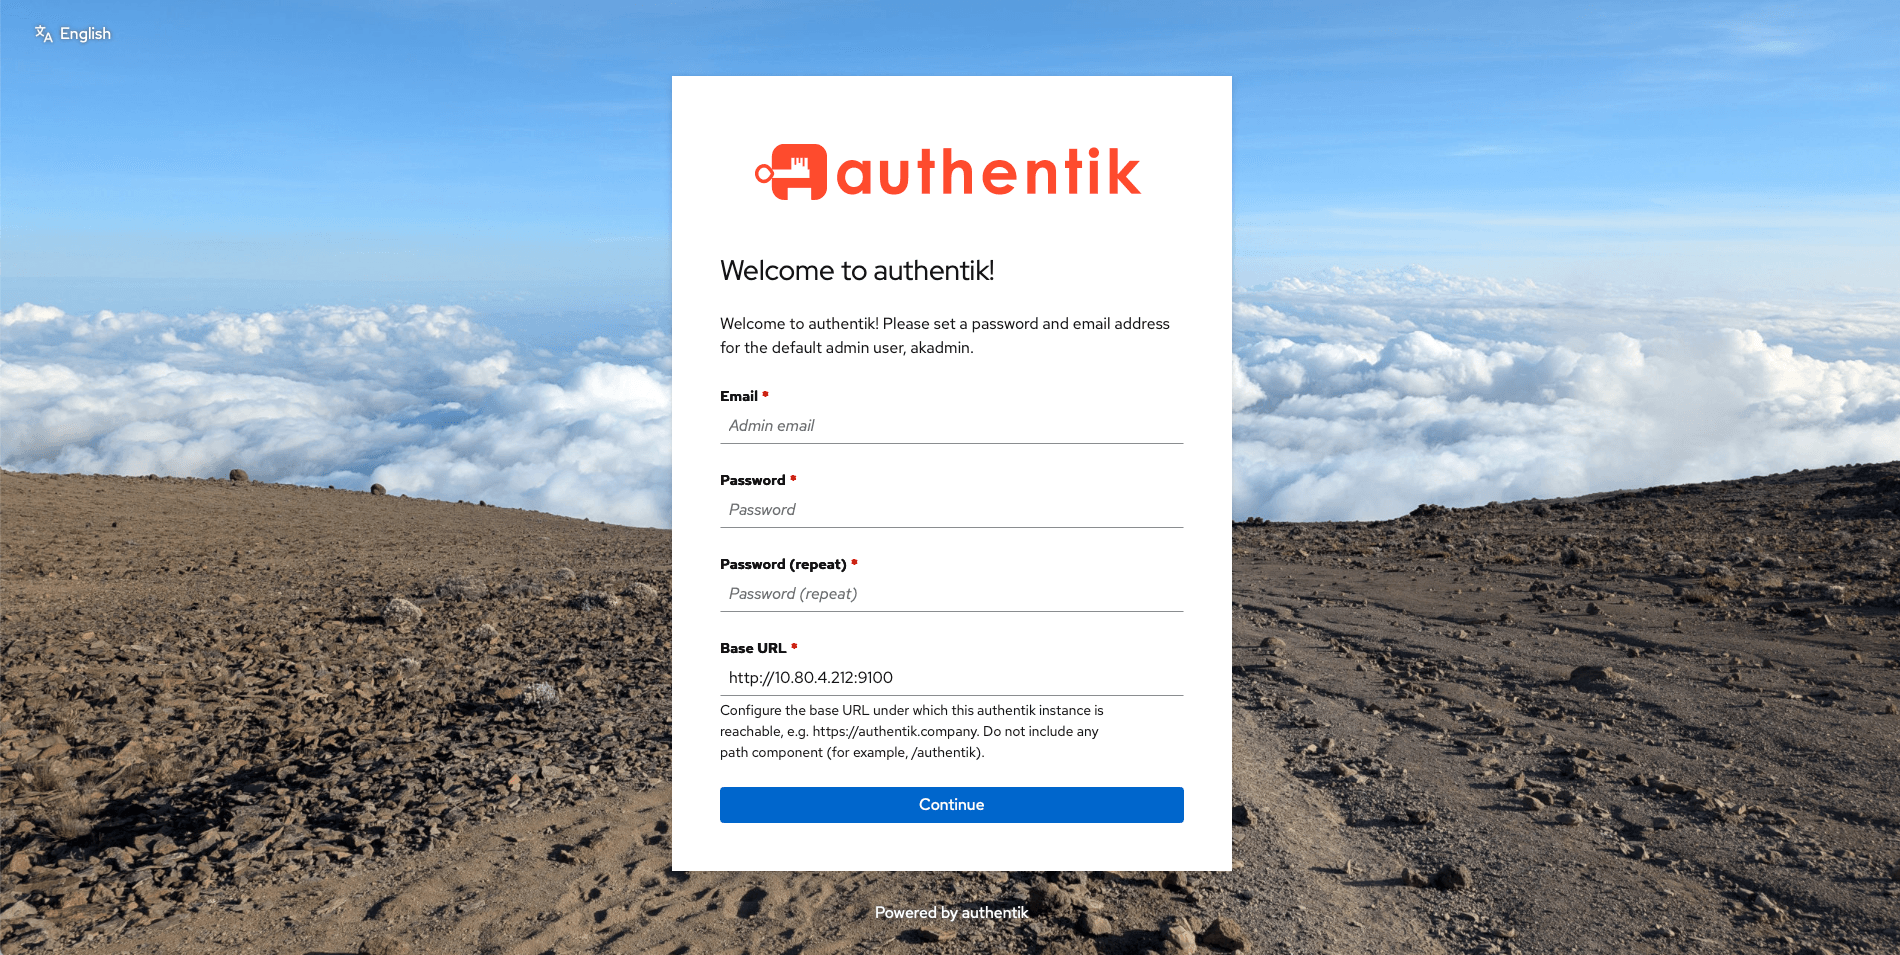
Use an address you control. This account can do everything, so give it a real password and store it somewhere durable.
Until someone completes this form, anyone who can reach the port can become the administrator of your identity provider. Do it immediately after the containers come up — not tomorrow.
You land on the Application Dashboard — the user-facing view, not the admin one, and empty because nothing is configured yet.
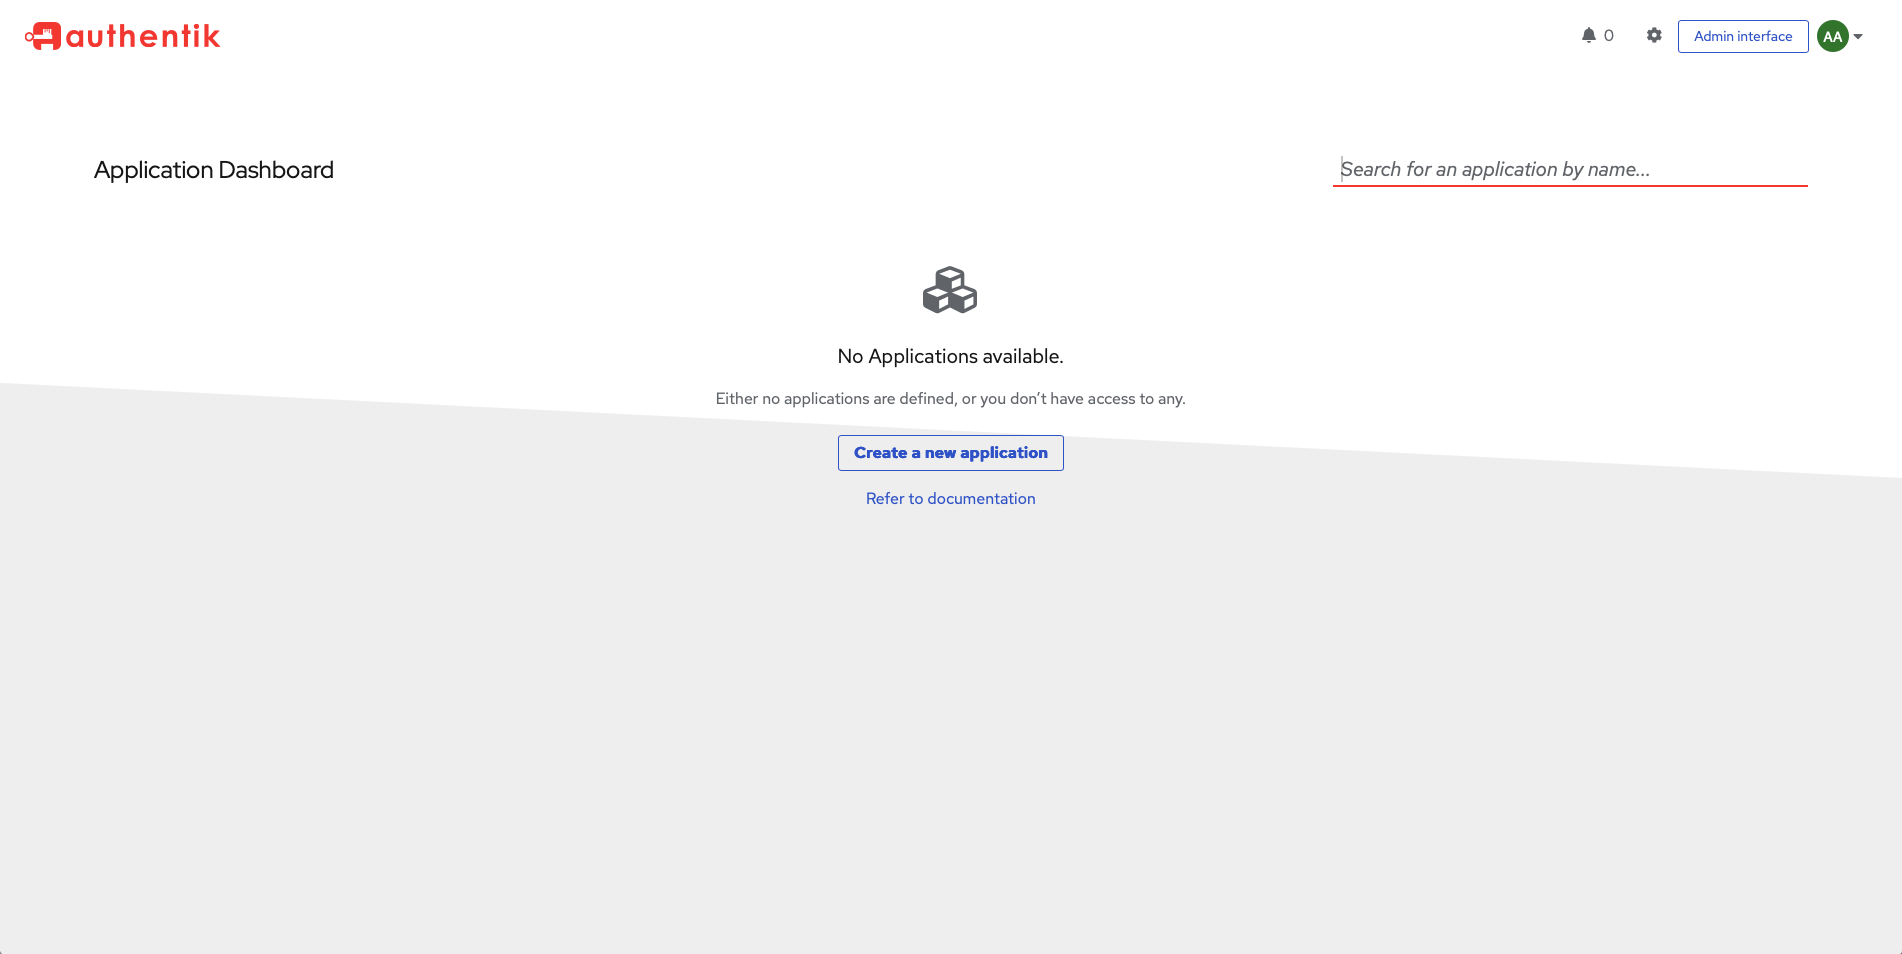
Create a new application here goes to the same place as the admin interface does; the
Admin interface button top-right is how you reach everything else.
Step 3 — Run the application wizard
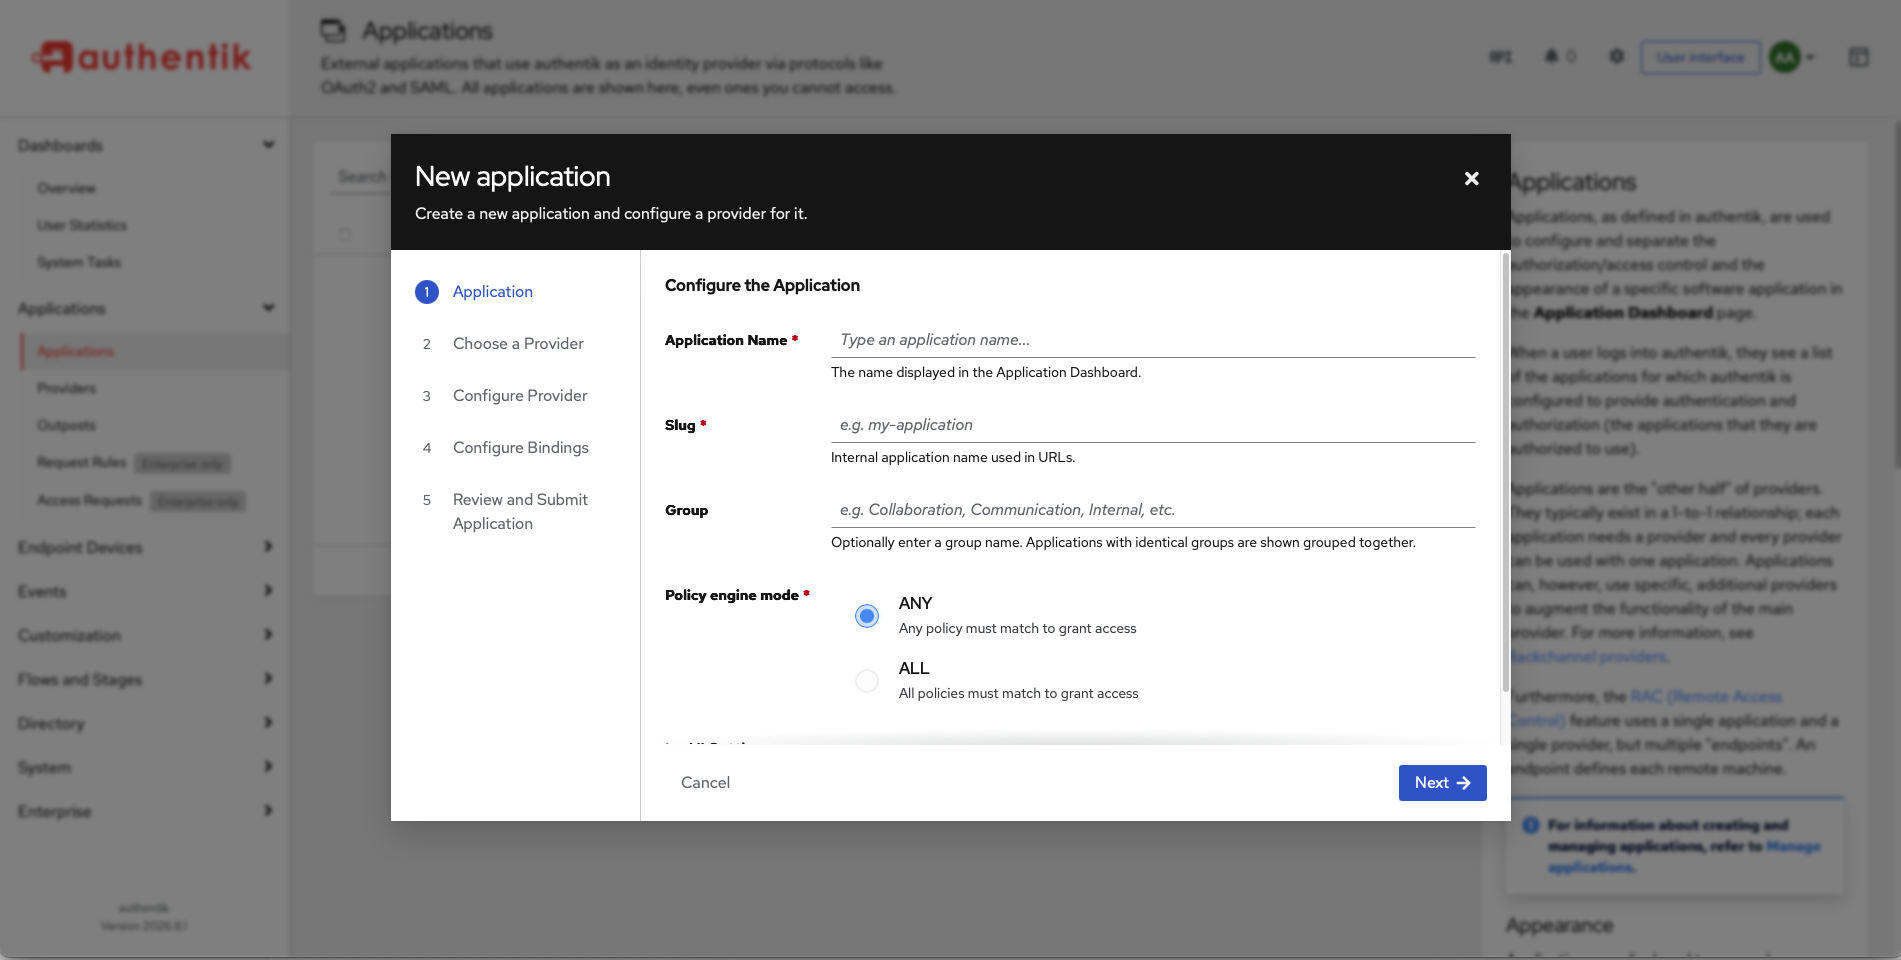
Applications → Applications → Create. authentik walks you through five steps, and the step list on the left is worth reading before you touch anything:
Application → Choose a Provider → Configure Provider → Configure Bindings → Review and Submit
That's the vocabulary from earlier, in order. The wizard creates the application and its
provider in one pass and pairs them for you. (Applications → Providers → Create builds
a provider on its own, if you ever need one before the app that uses it.)
3.1 — Application
- Application Name —
Langfuse. The label users see on the dashboard. - Slug —
langfuse. Load-bearing: it becomes part of the issuer URL, so changing it later changes the URL you have to reconfigure Langfuse with. - Group — leave empty. This groups apps on the dashboard; it has nothing to do with user groups or access control, despite the name.
- Policy engine mode — leave on ANY. It decides how multiple bound policies combine. With no policies bound, it makes no difference yet.
3.2 — Choose a Provider
Eight provider types. Take OAuth2/OpenID Provider — "OAuth2 Provider for generic OAuth and OpenID Connect Applications."
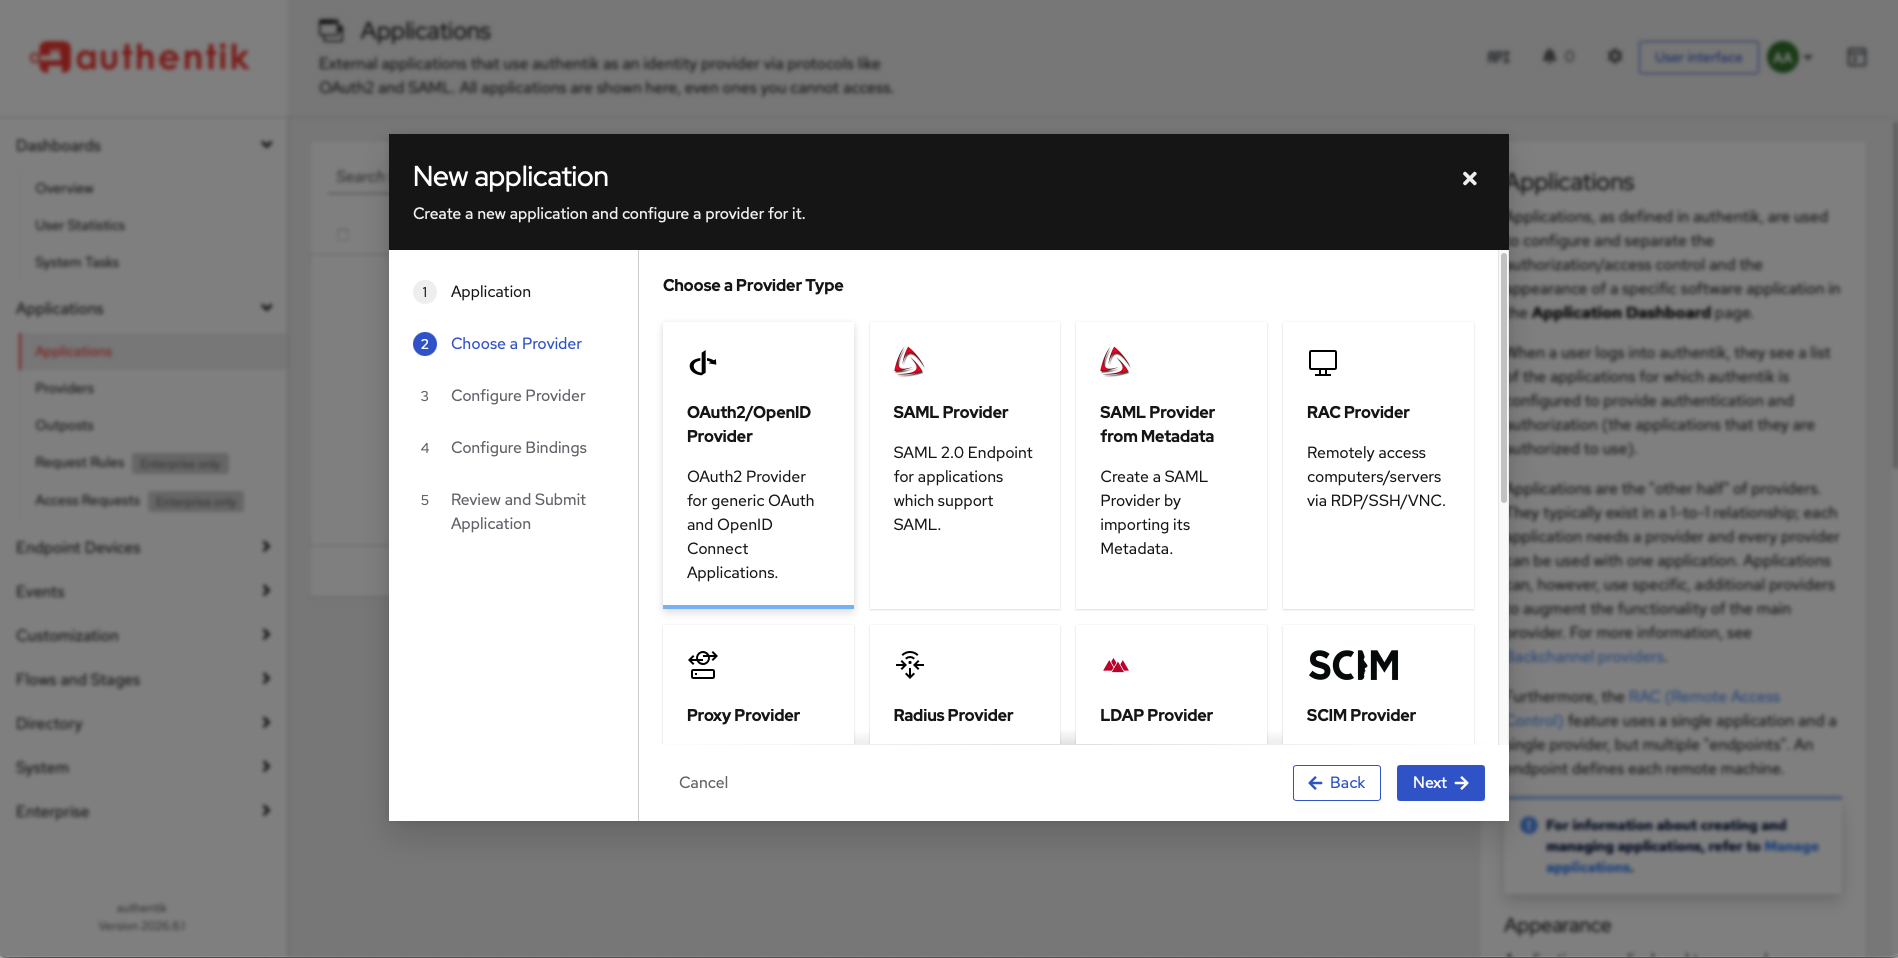
Worth knowing what you're not picking, because two of these solve a different problem: Proxy Provider puts authentik in front of an app that has no SSO support of its own, and LDAP Provider exposes authentik to things that only speak LDAP. Langfuse speaks OIDC natively, so it gets a real OIDC provider.
3.3 — Configure Provider
The step that matters, and the one that will cost you time if you rush it.
-
Authorization flow —
default-provider-authorization-explicit-consent. "Explicit" shows the user a consent screen listing what Langfuse asked for. The implicit variant skips it. Pick explicit for a first build: that screen is a live readout of your scope configuration, which makes a misconfiguration visible instead of silent. -
Client type — Confidential (scrolled above the redirect fields). Langfuse is a server and can keep a secret, so it gets one. Public clients are for browsers and mobile apps that can't.
-
Redirect URIs/Origins (RegEx) — the field with two dropdowns and a value. Set the mode to Strict, the purpose to Authorization, and the URI to Langfuse's NextAuth callback:
http://10.80.4.212:3001/api/auth/callback/customThe trailing
customis not a placeholder — it's the provider ID NextAuth assigns to its generic OIDC provider. Use your own host and port, but that path is fixed. -
Signing Key — leave
authentik Self-signed Certificate. This signs the ID token; Langfuse fetches the matching public key from thejwks_uriin Step 5 and verifies against it. Self-signed is correct here — the RP trusts this key because discovery handed it over, not because a CA vouched for it. -
Logout URI and token validities — leave alone.
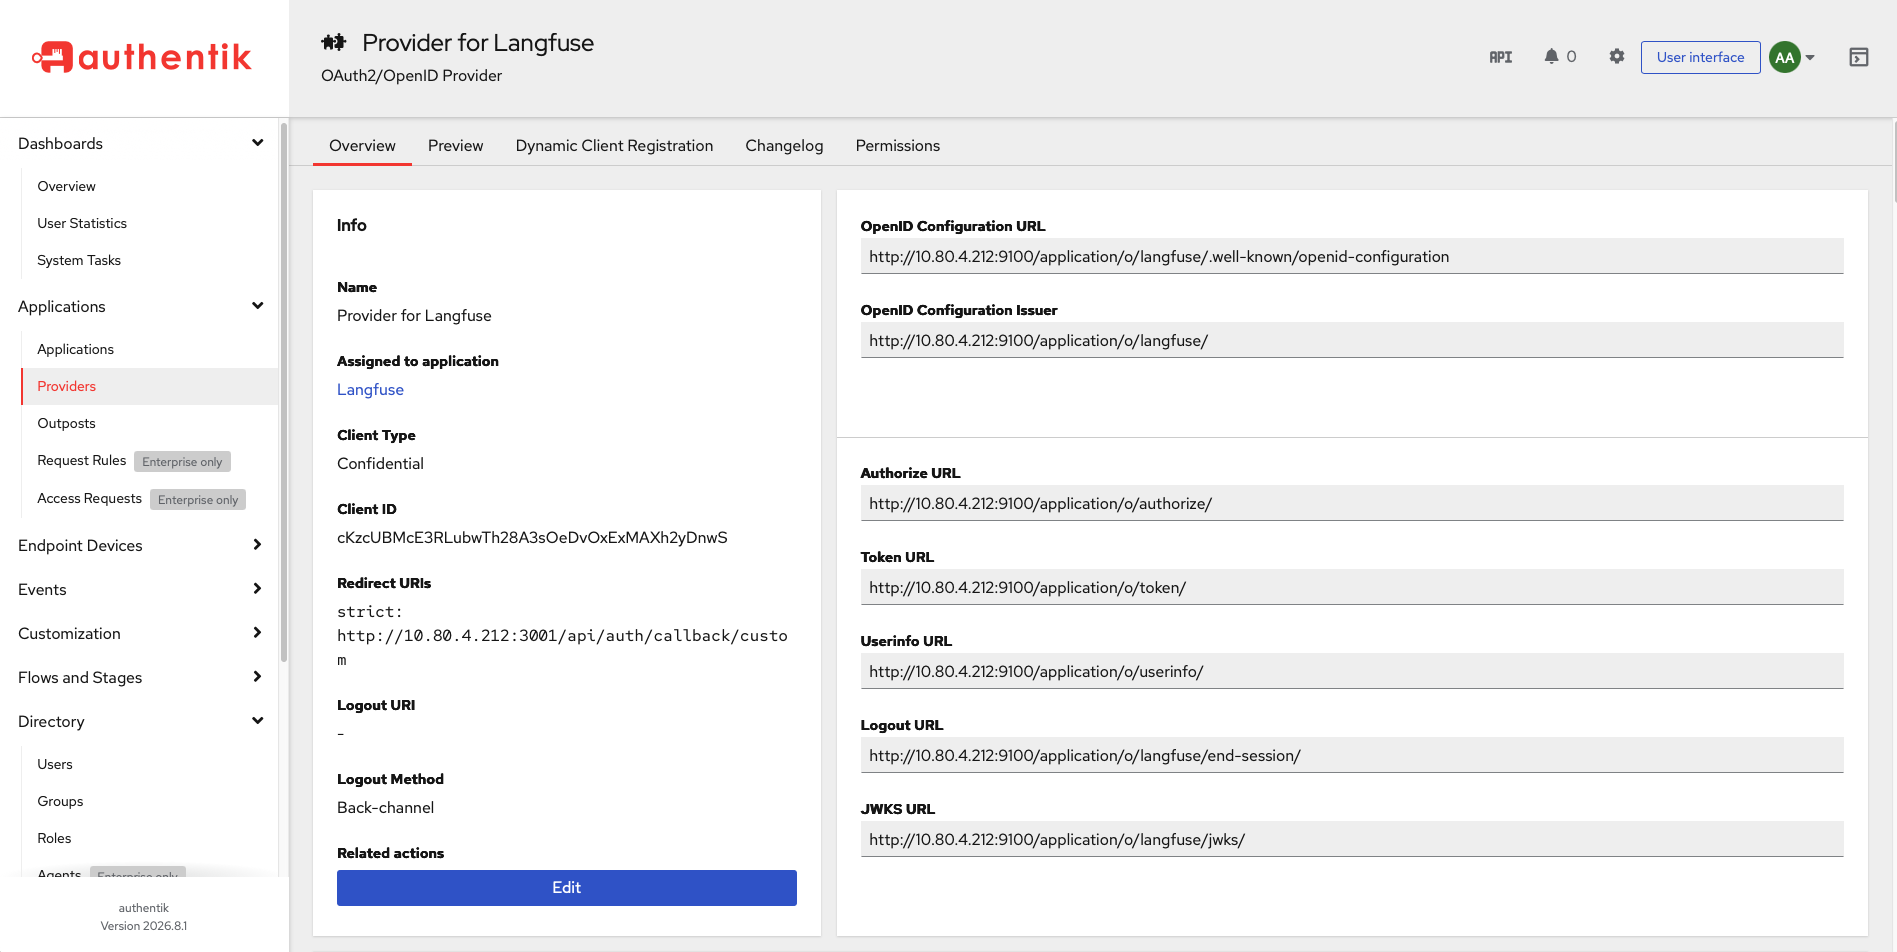
The provider once it's saved — explicit-consent authorization flow, Confidential client type, and Authorization Code as the grant:
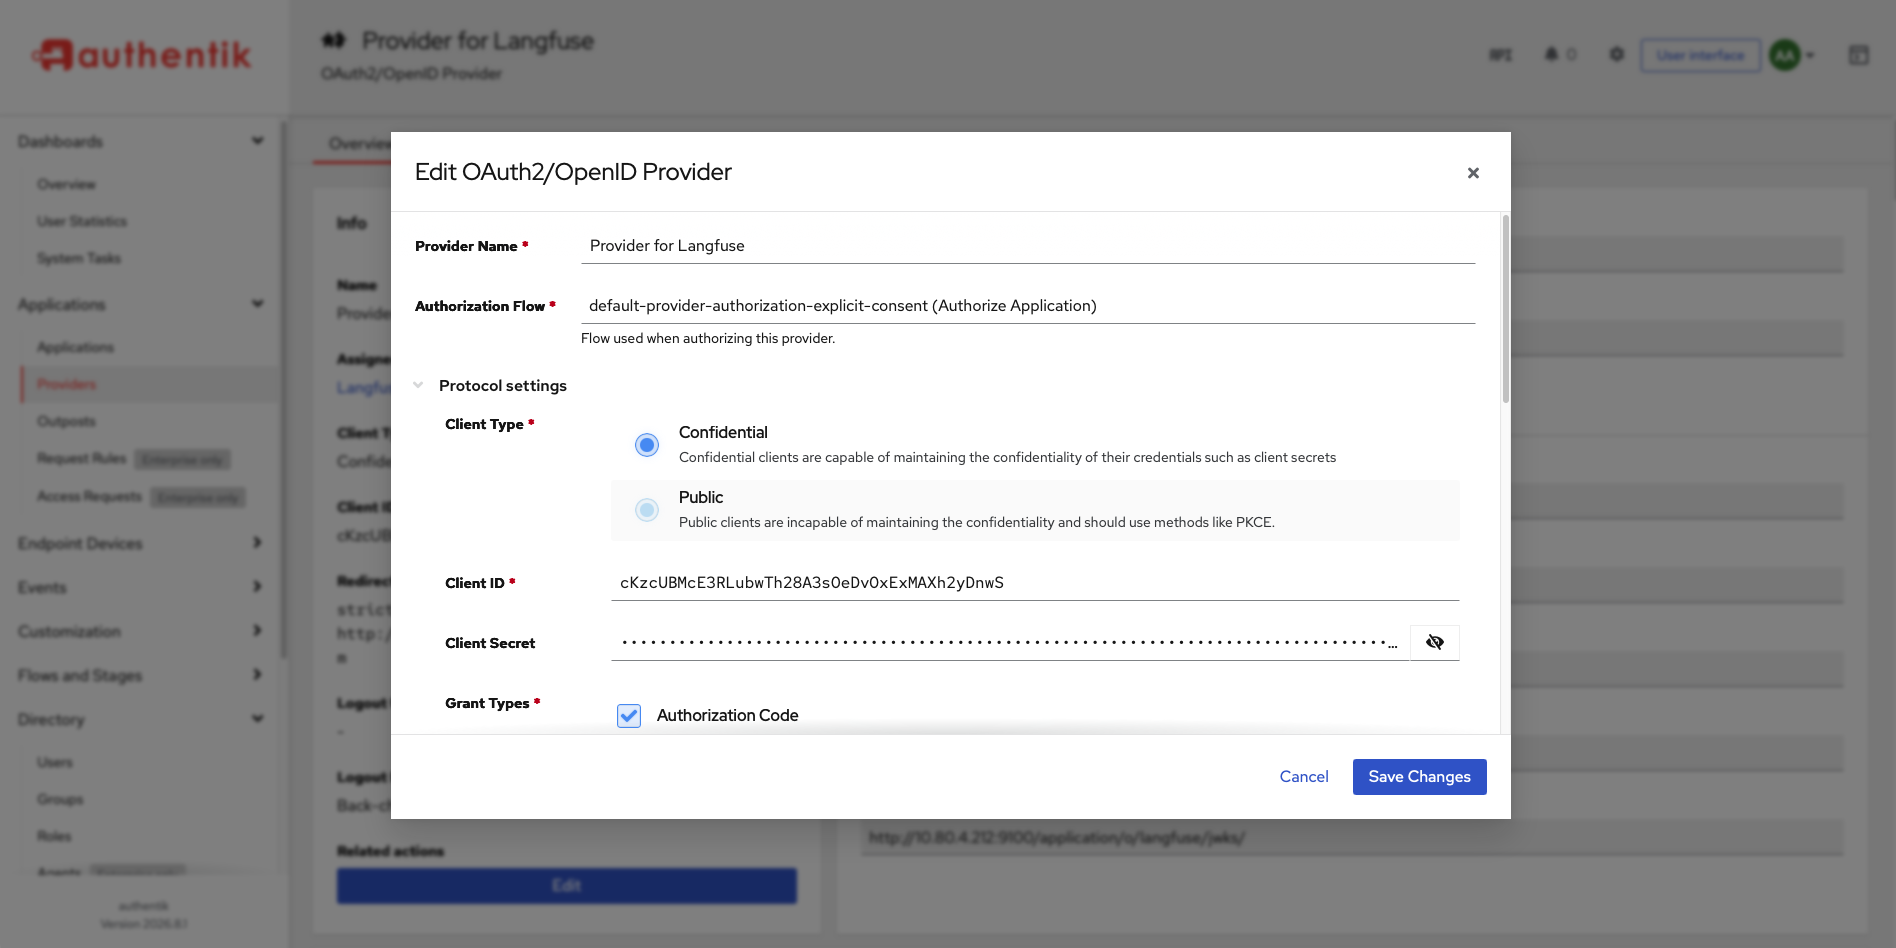
The mode dropdown offers Regex as well, and authentik's own help text points out you
can set it to .* to allow any redirect URI. Don't. An open redirect URI means anyone
who can start a login can have the authorization code delivered to a host they control.
Strict, with one exact URL, is the whole point of the field.
Further down, Scopes comes pre-populated with four mappings: email, openid,
profile and offline_access. Leave them. openid is mandatory and is what marks this
as OIDC rather than bare OAuth2. email is the claim Langfuse keys the account on.
profile carries the display name. offline_access is the one the wizard adds without
asking — it permits a refresh token, so a session can be renewed without sending the user
back through the login flow.
3.4 — Configure Bindings
No bound policies. — and we are leaving it that way.
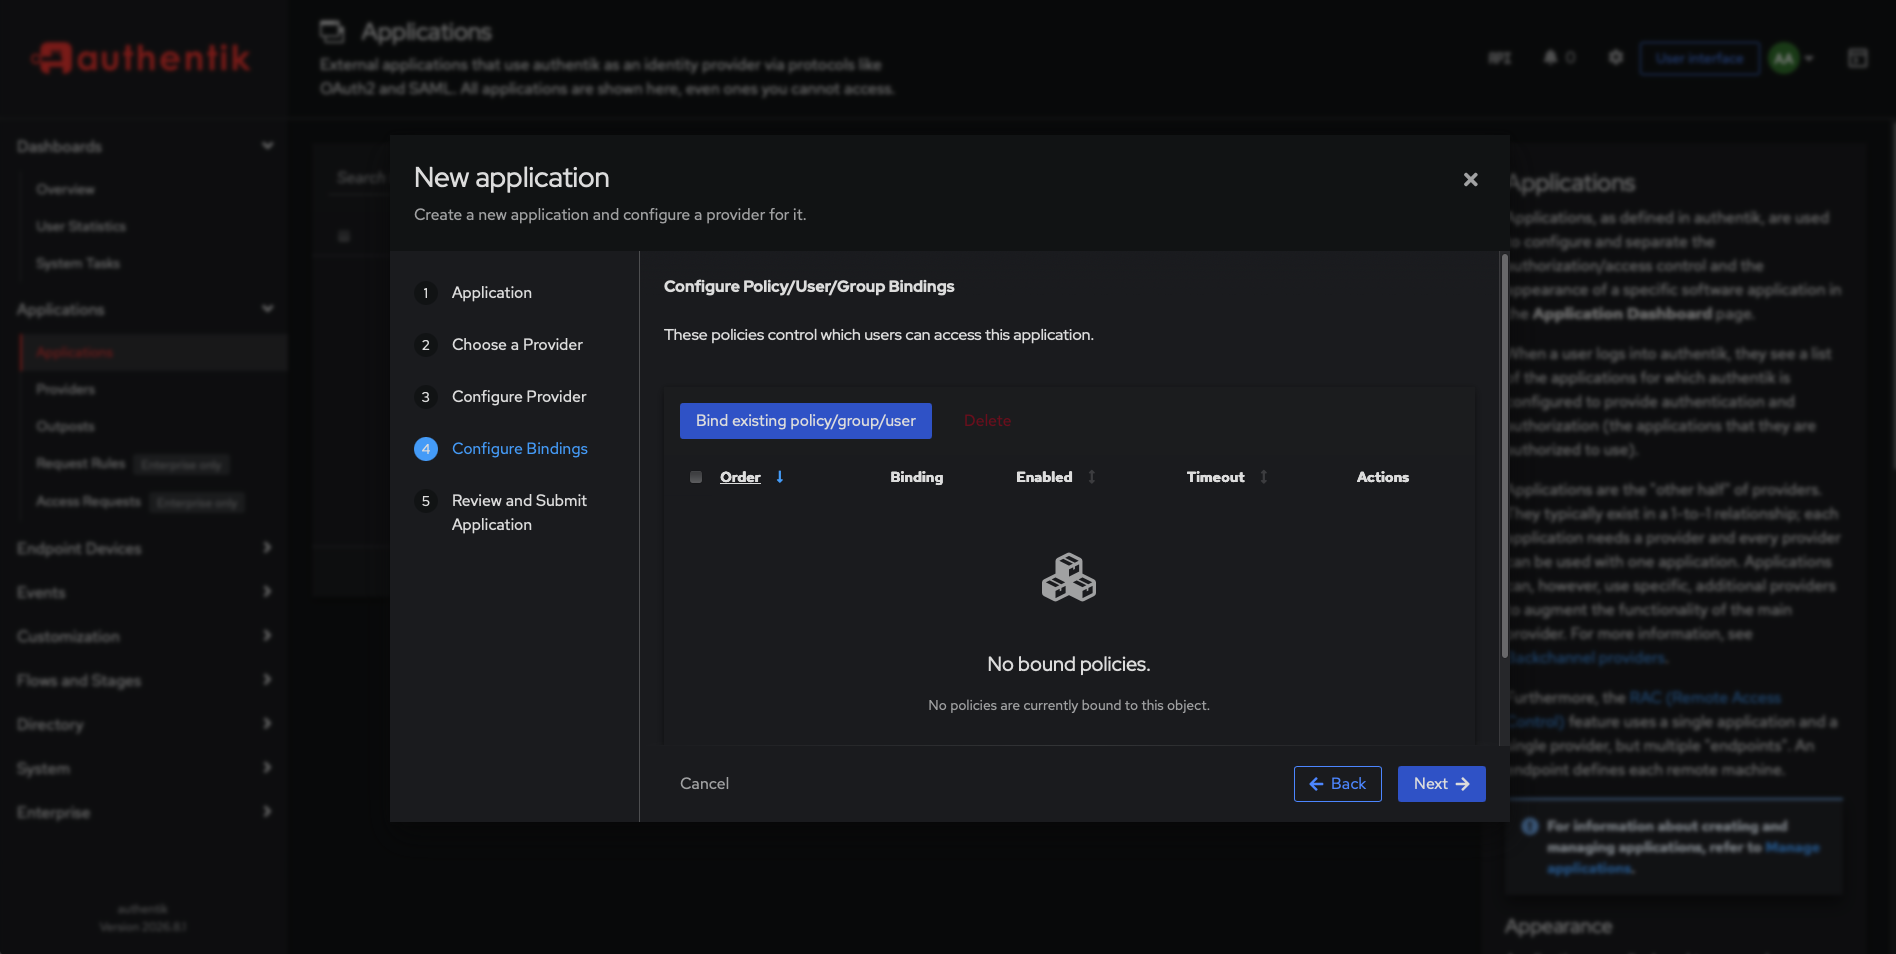
Read the wizard's own description: "These policies control which users can access this application." With nothing bound, the answer is everyone who can authenticate. On a box where you're the only account, that's the same thing as "just me" — which is why it's tolerable here and why the wizard lets you skip it.
It is not access control. Every account you ever create in this authentik gets into Langfuse by default, and nothing will warn you. Groups and policy bindings are how that gets fixed, and they're the subject of the next post — where the thing being protected is a gateway and the answer matters a great deal more.
3.5 — Review and Submit
Check the slug and the redirect URI once more, then submit.
Step 4 — Read the configuration back out of authentik
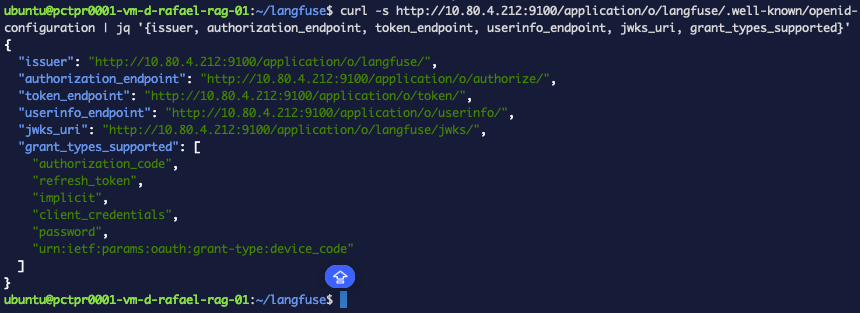
Rather than assembling URLs by hand, ask authentik. Every OIDC provider publishes a discovery document, and authentik's lives under the application slug:
curl -s http://10.80.4.212:9100/application/o/langfuse/.well-known/openid-configuration \
  | jq '{issuer, authorization_endpoint, token_endpoint, userinfo_endpoint, jwks_uri, grant_types_supported}'
{
  "issuer": "http://10.80.4.212:9100/application/o/langfuse/",
  "authorization_endpoint": "http://10.80.4.212:9100/application/o/authorize/",
  "token_endpoint": "http://10.80.4.212:9100/application/o/token/",
  "userinfo_endpoint": "http://10.80.4.212:9100/application/o/userinfo/",
  "jwks_uri": "http://10.80.4.212:9100/application/o/langfuse/jwks/",
  "grant_types_supported": [
    "authorization_code",
    "refresh_token",
    "implicit",
    "client_credentials",
    "password",
    "urn:ietf:params:oauth:grant-type:device_code"
  ]
}
Two things to take from this. The issuer is the only URL Langfuse needs — it will
fetch this same document and discover the rest. And grant_types_supported lists what
the protocol offers, not what your provider will accept; we're using
authorization_code and the presence of password in that list is not an invitation.
Now the client credentials. They're in the provider's detail page in the UI, but
docker compose exec is faster and copy-pastes cleanly:
cd ~/authentik && docker compose exec server ak shell -c "
from authentik.core.models import Application
p = Application.objects.get(slug='langfuse').get_provider()
print('PROVIDER     :', p.name)
print('CLIENT_ID    :', p.client_id)
print('CLIENT_SECRET:', p.client_secret)
"
Note that this looks the provider up through the application slug rather than by
provider name. The wizard named your provider Provider for Langfuse, not langfuse —
the slug is the thing you chose and the thing that stays predictable. get_provider()
also matters: reaching for application.provider hands back the base class with
client_id empty, which looks alarmingly like a broken provider and isn't.
Keep that output out of your shell history and out of screenshots.
The provider's detail page carries the same values, if you'd rather read them there — client type, client ID, the strict redirect URI, and every discovery URL in one place. The client secret is the one thing it doesn't print:
Step 5 — Point Langfuse at it
Langfuse reads generic OIDC settings from AUTH_CUSTOM_* variables. Add them to
~/langfuse/.env:
AUTH_CUSTOM_NAME=authentik
AUTH_CUSTOM_ISSUER=http://10.80.4.212:9100/application/o/langfuse
AUTH_CUSTOM_CLIENT_ID=<the client id from Step 4>
AUTH_CUSTOM_CLIENT_SECRET=<the client secret from Step 4>
AUTH_CUSTOM_SCOPE=openid email profile
The issuer here has no trailing slash while the discovery document reported one. Both work — Langfuse normalizes it.
Also confirm NEXTAUTH_URL matches the address you actually browse to:
grep NEXTAUTH_URL ~/langfuse/.env
NEXTAUTH_URL=http://10.80.4.212:3001
If this says localhost while your redirect URI says 10.80.4.212, the callback will
be built with the wrong hostname and authentik will reject it.
Now the part that will waste your afternoon if you skip it. Writing those variables
into .env is not enough. Langfuse's shipped compose file lists the variables it passes
into the langfuse-web container explicitly, and AUTH_CUSTOM_* isn't among them —
they land in .env, get read by Compose for interpolation, and never reach the process.
Langfuse starts fine and shows no SSO button, with nothing in the logs to say why.
Pass them through with an override file, ~/langfuse/docker-compose.override.yml:
services:
  langfuse-web:
    environment:
      AUTH_CUSTOM_NAME: ${AUTH_CUSTOM_NAME}
      AUTH_CUSTOM_ISSUER: ${AUTH_CUSTOM_ISSUER}
      AUTH_CUSTOM_CLIENT_ID: ${AUTH_CUSTOM_CLIENT_ID}
      AUTH_CUSTOM_CLIENT_SECRET: ${AUTH_CUSTOM_CLIENT_SECRET}
      AUTH_CUSTOM_SCOPE: ${AUTH_CUSTOM_SCOPE}
      AUTH_CUSTOM_ALLOW_ACCOUNT_LINKING: "true"
Compose merges docker-compose.override.yml automatically, so the upstream file stays
untouched and survives upgrades. That last variable is the fix for a failure you'd
otherwise hit in the next step — the troubleshooting section explains what it does and
what it costs.
Recreate the web container and verify the variables arrived:
cd ~/langfuse && docker compose up -d langfuse-web
cd ~/langfuse && docker compose exec langfuse-web env | grep -c AUTH_CUSTOM
Six. If it's zero, the override isn't being picked up — check you're running compose
from ~/langfuse and that the filename is exactly docker-compose.override.yml.

Step 6 — Sign in
Open http://10.80.4.212:3001/auth/sign-in, in a private window so you're not looking at
an existing session. There's a new button below the divider under the password form.
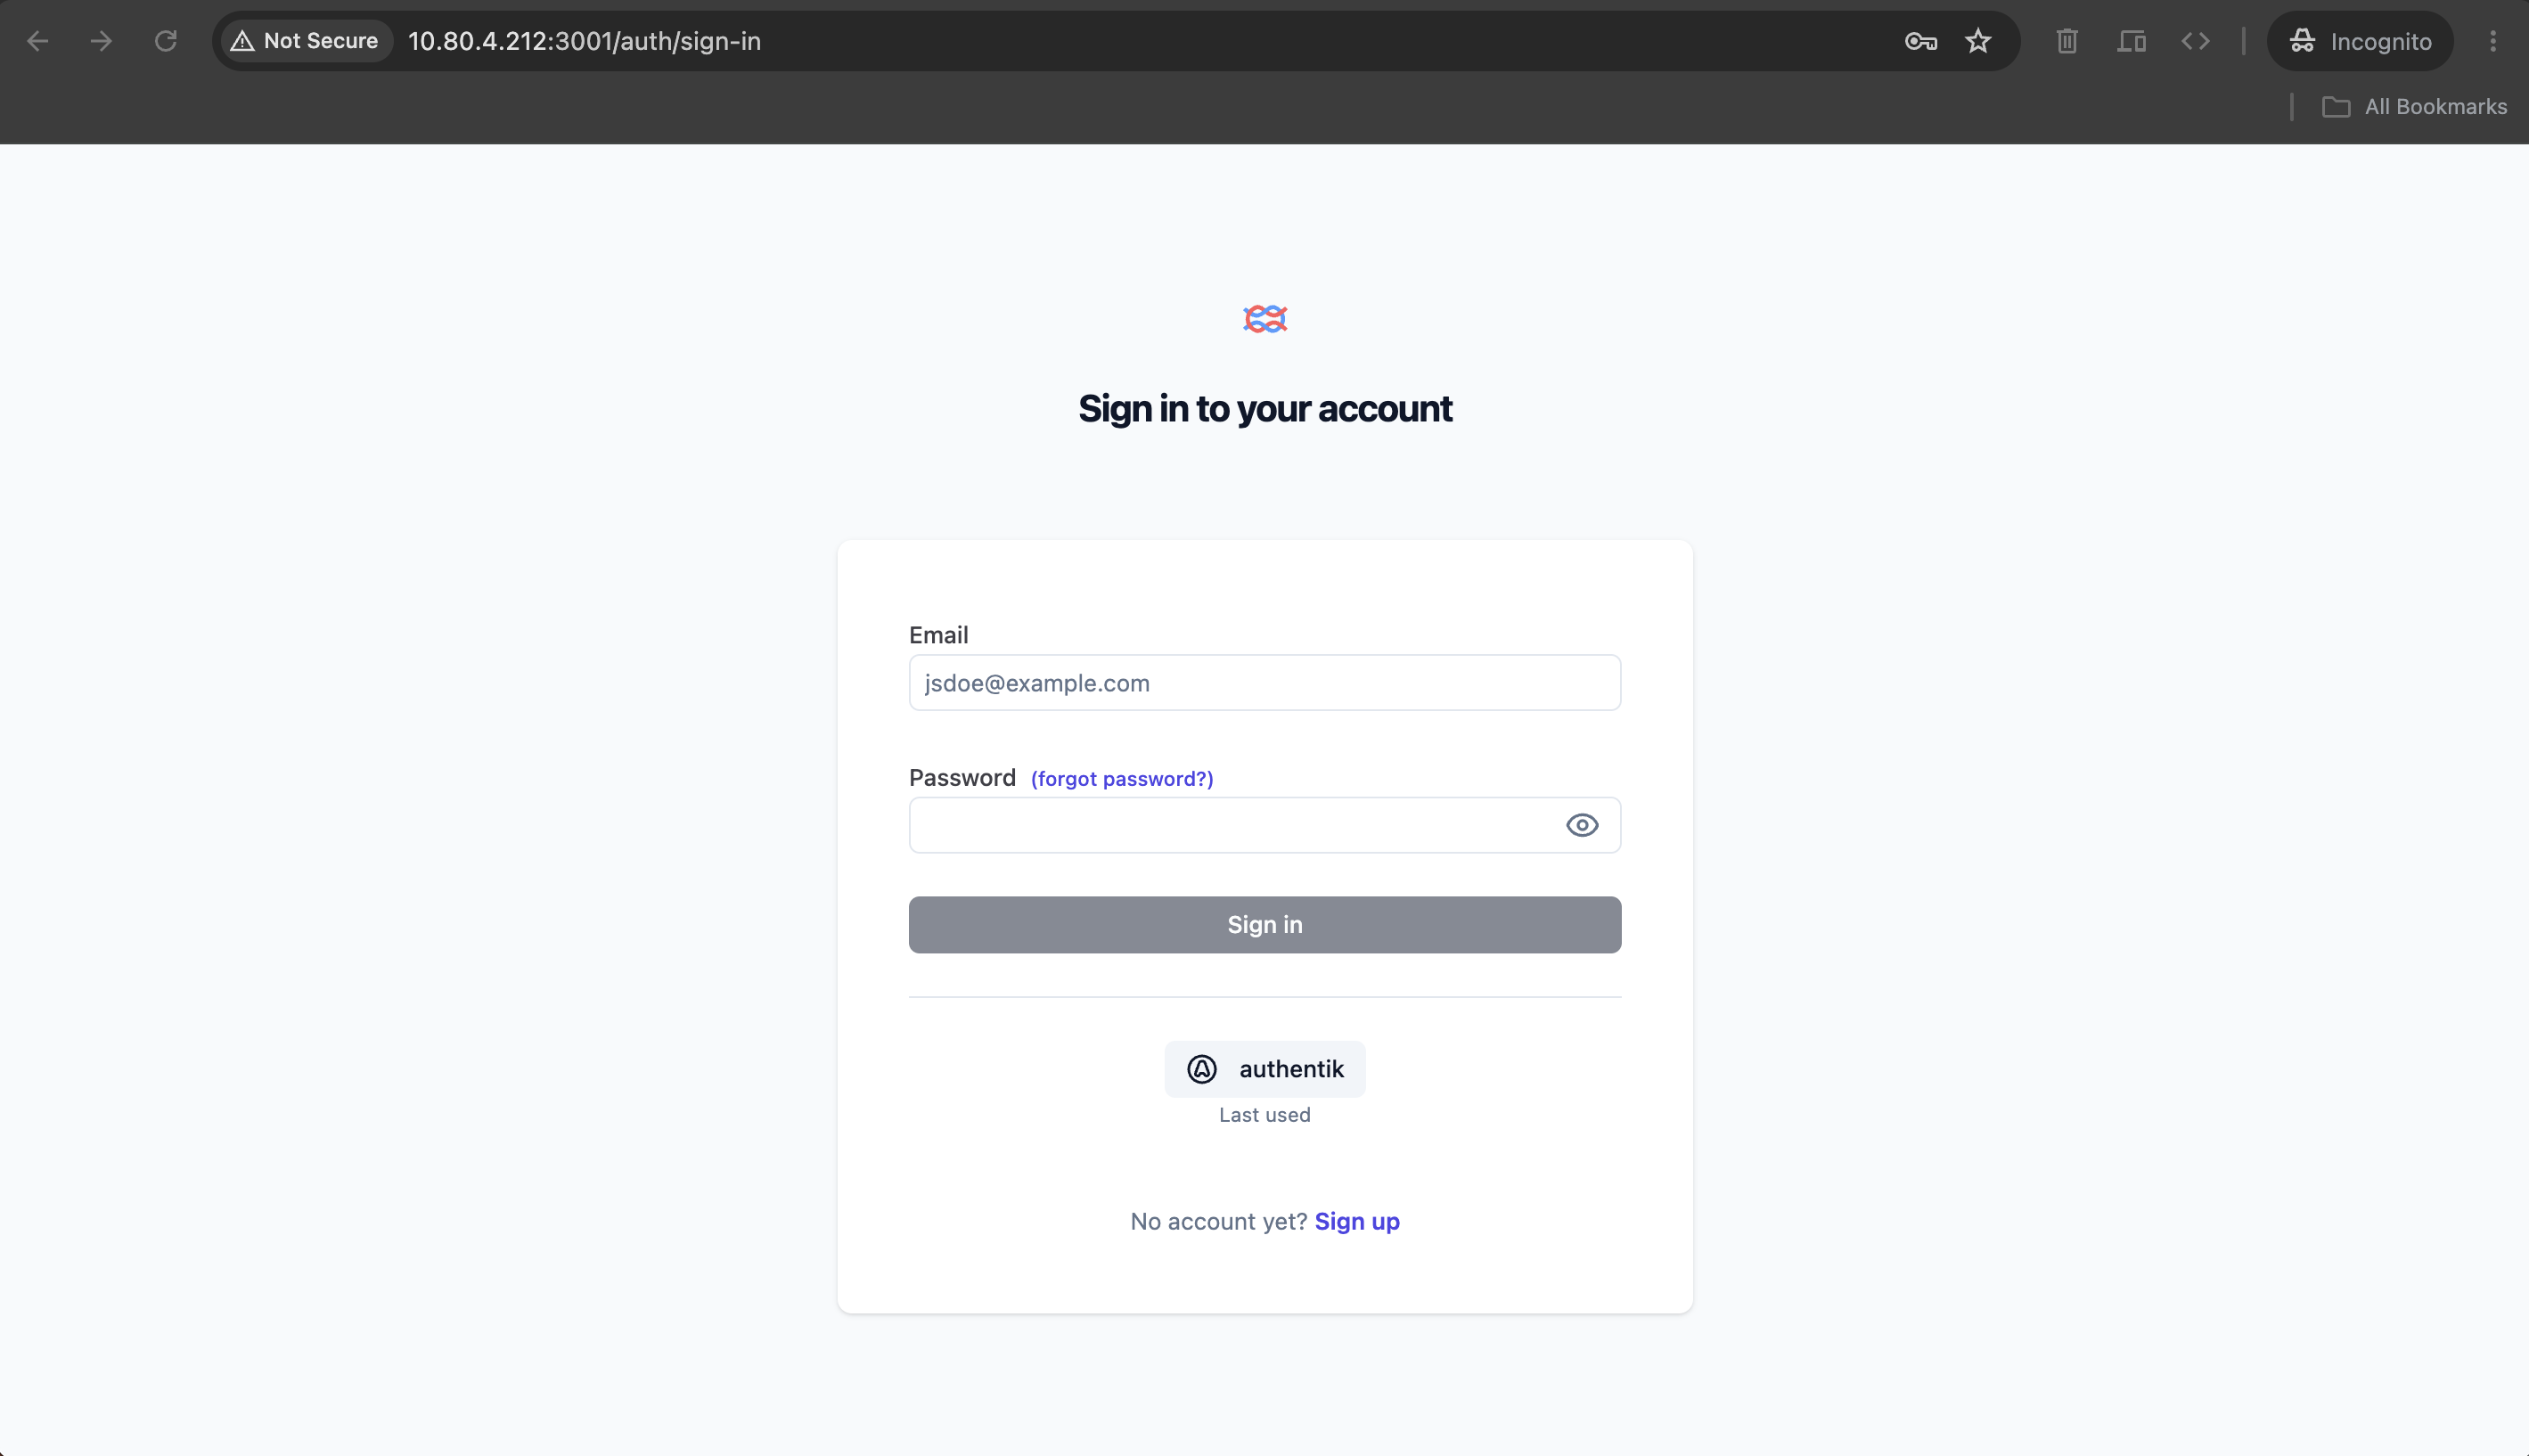
The button is labelled authentik because that is your AUTH_CUSTOM_NAME value, rendered
verbatim. Set it to Company SSO and that's what the button says — it's a display string
and nothing else depends on it.
Two other things in that screenshot are worth naming rather than glossing over. The email-and-password form is still there, and so is Sign up — SSO has been added, not substituted. And the address bar says Not Secure, correctly: this is plain HTTP.
Click the button and you're handed to authentik, which tells you where you came from:
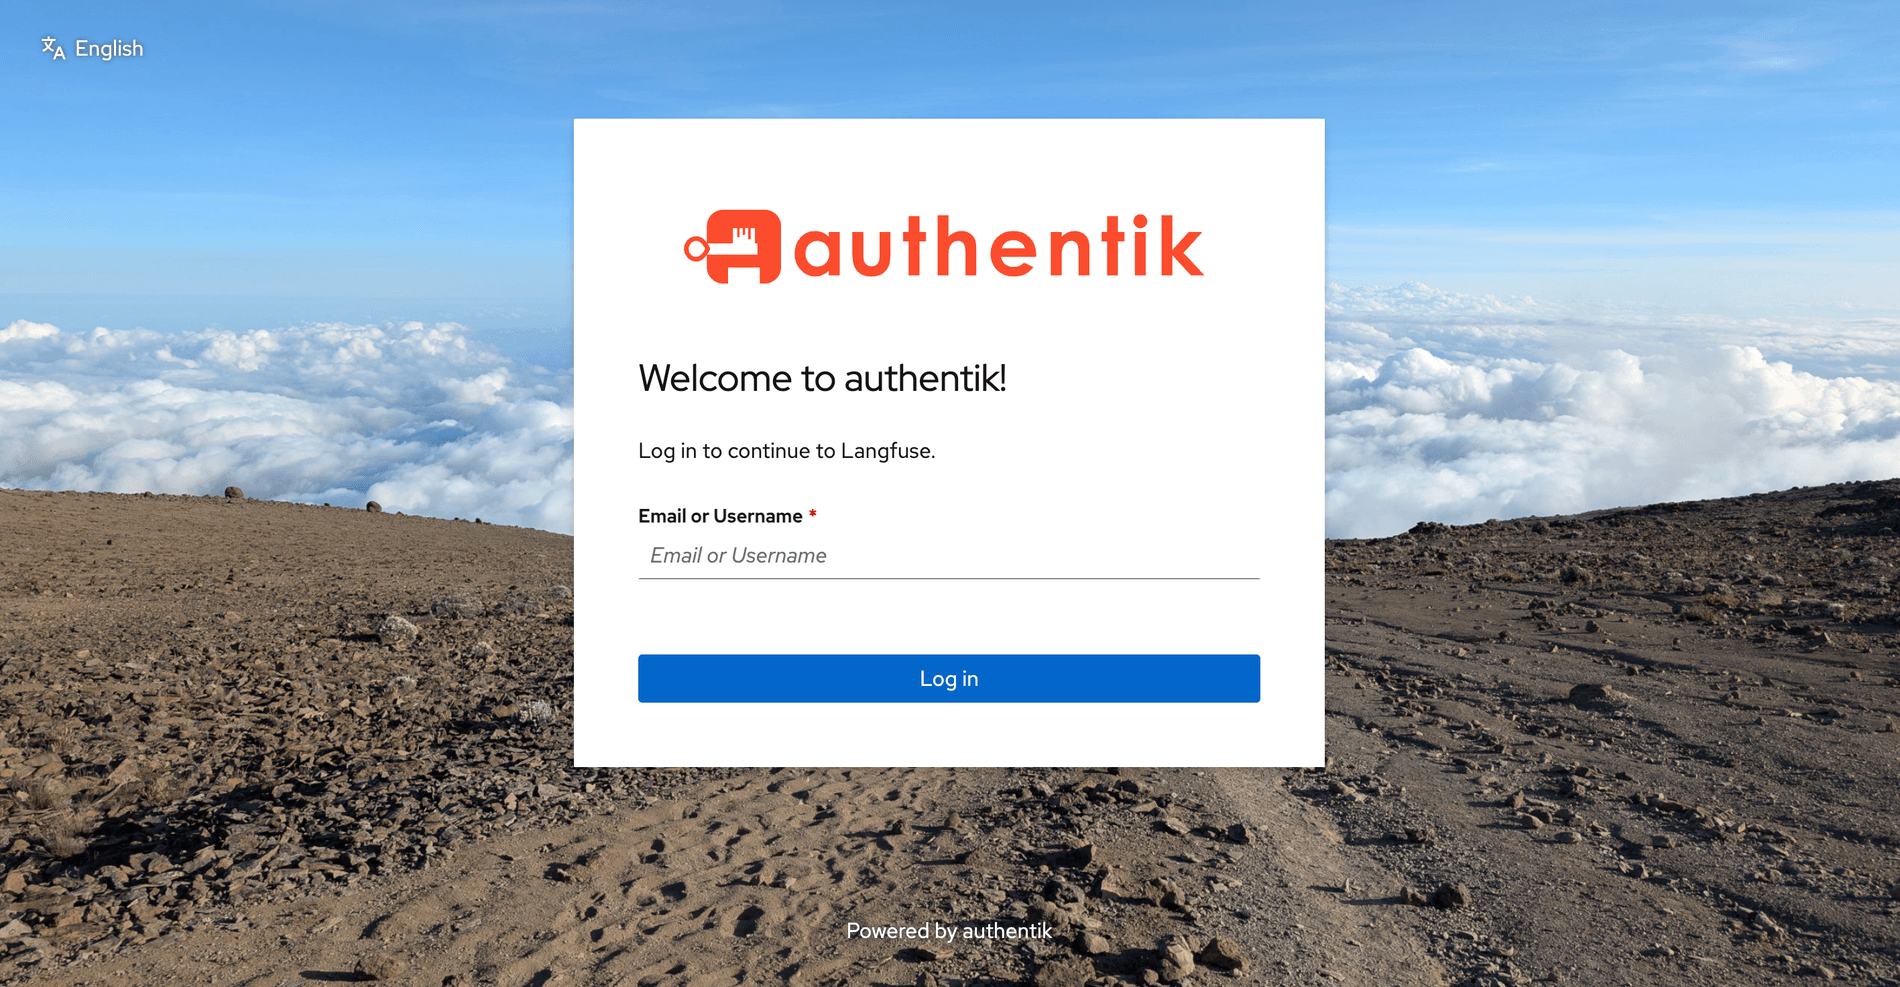
Log in, and because we chose the explicit-consent flow in Step 3.3, authentik shows what Langfuse asked for before it hands anything over:
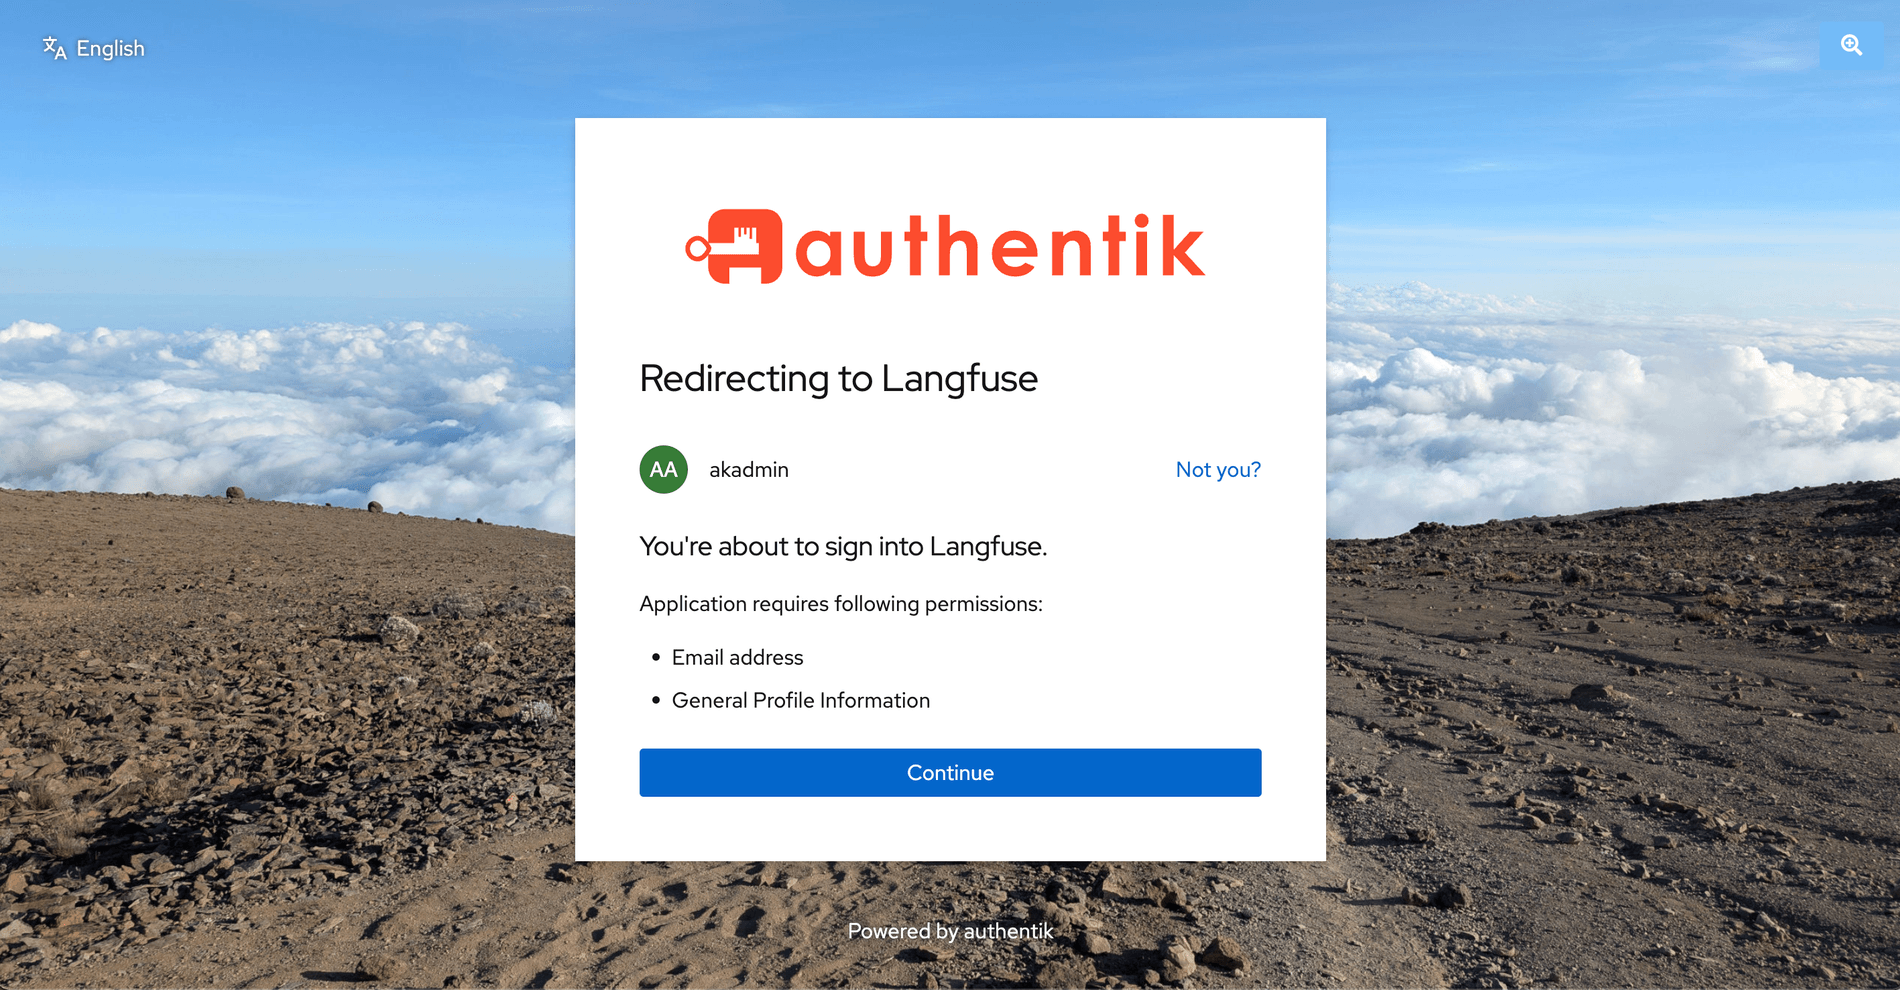
It reads You're about to sign into Langfuse, identifies you as akadmin, and lists two
permissions — Email address and General Profile Information. Those are the email
and profile scopes in human-readable form. openid doesn't get a line of its own: it
carries no personal data to consent to, it's the flag that makes this OIDC rather than
plain OAuth2. So a three-scope configuration produces a two-item consent screen, which is
correct and not a sign that something dropped.
Continue, and you land in Langfuse, signed in, as the identity authentik vouched for.
That's the loop closed. Langfuse never saw a password.
Troubleshooting — the errors this run actually produced
OAuthAccountNotLinked
The first sign-in attempt bounced back to the Langfuse login page with
?error=OAuthAccountNotLinked in the URL and nothing more.
The cause: an email-and-password Langfuse account already existed with the same address authentik was now presenting. NextAuth's default is to refuse the merge. That default is protective — if an identity provider can assert any email and the app auto-links on email alone, then whoever controls the provider can take over an existing account by claiming its address.
AUTH_CUSTOM_ALLOW_ACCOUNT_LINKING: "true" tells Langfuse to link them anyway. It is
safe here because you own the only provider and you control who can create accounts
in it. It would not be safe pointed at a provider where anyone can self-register an
arbitrary email.
The alternative, if you'd rather not enable it: delete the pre-existing local account and let SSO create a fresh one.
redirect_uri mismatch, or authentik refusing to redirect
Read the failing URL in the address bar and compare it to the provider's redirect URI
character by character. In this run the mismatches worth naming were the trailing
/api/auth/callback/custom path (any other suffix fails), localhost versus the LAN IP,
and a stray trailing slash. Strict matching means strict.
No SSO button, no errors
That's the compose-environment trap from Step 5. Check the variables reached the container:
cd ~/langfuse && docker compose exec langfuse-web env | grep AUTH_CUSTOM_ISSUER
Empty output means Langfuse is running without the config it never knew it was missing.
Discovery fails from inside the container
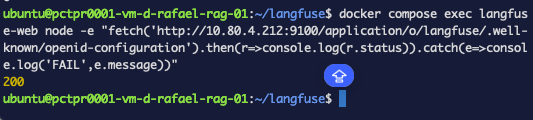
Your browser reaching authentik is not proof that Langfuse can. The token exchange is container-to-container:
The langfuse-web image ships no curl, so use the Node runtime that's already in
there — fetch is built in:
cd ~/langfuse && docker compose exec langfuse-web node -e \
  "fetch('http://10.80.4.212:9100/application/o/langfuse/.well-known/openid-configuration').then(r=>console.log(r.status)).catch(e=>console.log('FAIL',e.message))"
200 is what you want. FAIL with a connection error means the container can't reach
authentik at all, which is the actual thing being tested. This is also why the issuer is a LAN IP rather than localhost
— inside the Langfuse container, localhost is the Langfuse container.
You can run your own identity provider and put an app behind it over OIDC — reading the
issuer, client ID and secret out of authentik rather than assembling URLs by hand, and
recognising the two failures that actually stop you: a compose file that never passes the
variables through, and OAuthAccountNotLinked.
What this did and didn't buy you
Done: one identity provider, one place where accounts live, one place to revoke them. Langfuse no longer stores a password for you. And you now have a provider you can point the next app at in about five minutes.
Not done, and worth being clear about:
- No access control. Empty bindings mean every authentik account reaches Langfuse.
- Plain HTTP. The ID token and the client secret cross the network unencrypted. On a trusted LAN that's a tolerable starting point; exposed to anything else it isn't.
- One admin, no recovery path. If you lose
akadmin, you lose the provider that fronts everything pointed at it. - The old login still works. Password sign-in wasn't disabled, so SSO is currently an additional door, not a replacement one.
What's next
Part 4 puts identity in front of something where these gaps stop being tolerable: the LiteLLM gateway from the gateway series. Three things this post deliberately left alone:
- The control plane is not the data plane. SSO protects an admin UI. It does not protect an API — machine callers still authenticate with keys. For a gateway that distinction is the whole game, and assuming otherwise is how people conclude they've secured something they haven't.
- Groups and policy bindings, so that reaching the application requires membership rather than merely having an account.
- TLS and real exposure — the gateway is bound to
127.0.0.1:4000, and getting it properly reachable means a reverse proxy, a hostname and a certificate.
The provider-and-application steps will be a short recap with a link back here. The rest is new.